History
Until the discovery of X-rays by Wilhelm Conrad Röntgen in 1895, physical examination by methods of inspection, palpation, percussion and auscultation were the only methods of investigation of the chest.
Clinical Vignette
60 year old male presents to the emergency department for shortness of breath and coughing up frothy sputum. The dyspnea progressed over couple of weeks and now occurs at rest. He has medical history of ischemic heart disease and congestive heart failure. On physical examination there are classic signs of decompensated heart failure. Chest x-ray shows significant right-sided pleural effusion.
Next, you want to perform therapeutic thoracentesis. You want to find a spot that is relatively safe to avoid pneumothorax and other complications.
Physical Examination
Chest findings can be located using simple two-dimensional coordinate system – using vertical and horizontal axis (circumference). Alternatively, findings can be located in relation to other structures on chest wall.
Horizontal Axis (Circumference)
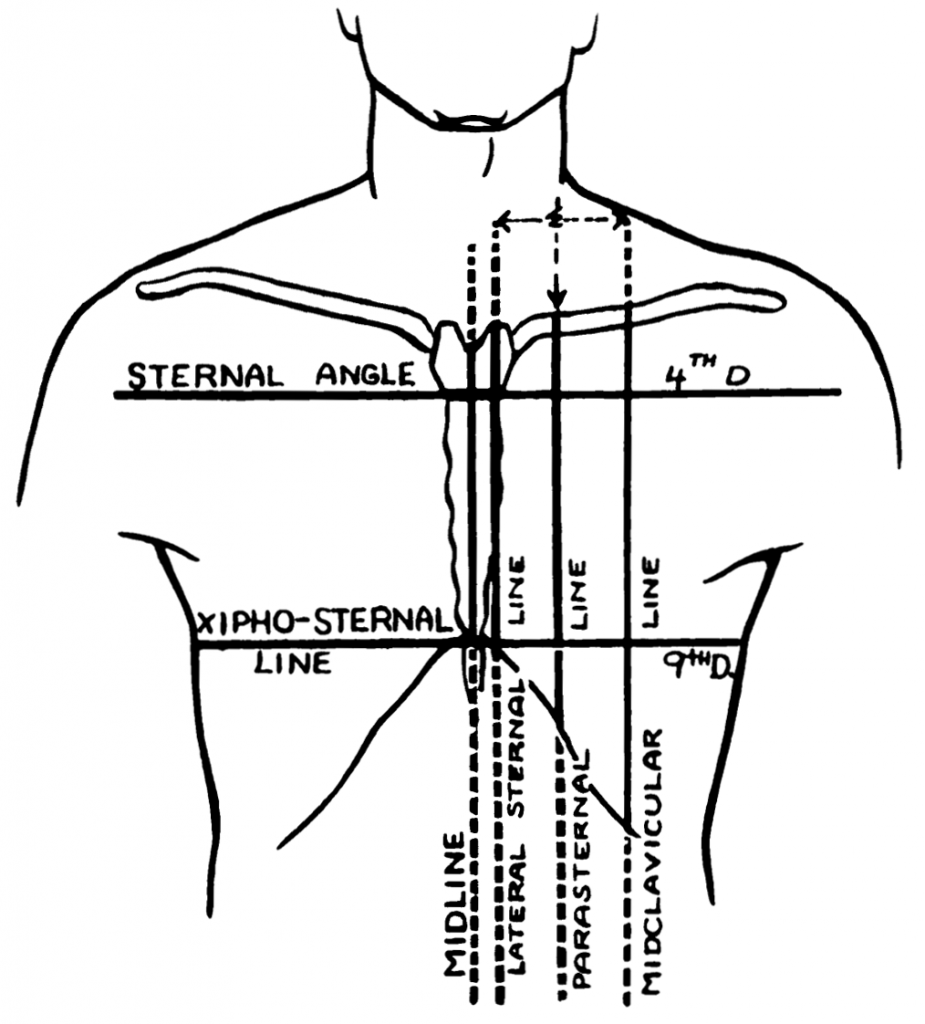
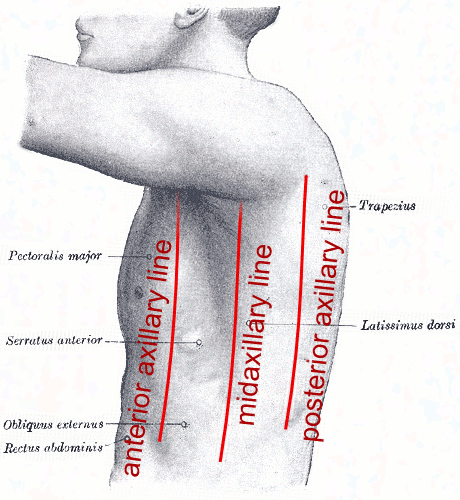
Finding can be located along chest circumference using vertical anatomical lines. These are theoretical lines drawn through anatomical structures. All vertical lines on the chest are parallel.
| Dropped vertically from | |
| Midsternal line (anterior midline) | middle of sternum |
| Lateral sternal line | lateral edge of sternum |
| Parasternal line | midpoint between lateral sternal and midclavicular line |
| Anterior axillary line | lateral edge of pectoralis major muscle |
| Midaxillary line | apex of axilla |
| Posterior axillary line | lateral edge of latissimus dorsi muscle |
| Scapular line | inferior angle of scapula |
| Paravertebral line | transverse processes of vertebrae |
| Vertebral line (dorsal midline) | spinal processes of vertebrae |


Vertical Axis
Locating finding on vertical axis can be done using two methods – by (1) counting ribs (anteriorly and posteriorly) or (2) counting vertebrae (posteriorly).
Counting ribs anteriorly
- Setup. Expose the chest of a patient. Respect privacy and modesty.
- Suprasternal notch. Using your index and middle finger, palpate the suprasternal notch.
- Sternal angle. Move your fingers inferiorly about two centimeters on the sternum. You will feel a crest that is called sternal angle (see later).
- Rib. Moving your finger laterally from the sternal angle you will feel rib articulating with the sternum. It’s the second rib. It’s not the first rib!
- Intercostal space. Letting your fingers slide little bit downwards from the second rib, you will feel indentation. That is second intercostal space. N.b. that all intercostal space are numbered respectively to their superior rib.
- Counting the rest. In an orderly fashion, slide your fingers inferiorly and laterally. To appreciate each rib, enclose it with middle and index finger. Repeat.
When counting ribs on the anterior chest it is important to remember the following.
- The first palpable rib is the second rib.
- Intercostal spaces are numbered respectively to the superior rib, i.e. second intercostal space is below the second rib.
- Lower ribs articulate with the sternum indirectly. It is hard to palpate lower ribs and intercostal spaces close to the sternum. Physician has to palpate in inferior and lateral direction.
Counting ribs posteriorly
When on the back, similar but reversed sequence can be used.
- Setup. Expose the chest of a patient. Respect privacy and modesty.
- Rib. Start in the lower back in the middle between posterior midline and scapular line. Palpate with your index and middle finger upward. The first rib palpable is twelfth.
- Intercostal space. Moving your fingers upward, just above the twelfth rib lies eleventh (11th) intercostal space.
- Counting the rest. In an orderly fashion, slide your fingers upward. To appreciate each rib, enclose it with your middle and index finger, just like on the anterior chest. Repeat.
Counting vertebrae
- Setup. Expose the chest of a patient. Respect privacy and modesty.
- Vertebra prominens. Ask the patient to bring chin to the chest, i.e. flex the neck. The most prominent spinous process is that of C7 (also called vertebra prominens). If two spinous processes are protruding, it’s C7 and Th1.
- Counting the rest. In an orderly fashion, move your fingers down the spinous processes. You should be able to appreciate each of the vertebra.
Interpretation
Sternal angle (angle of Louis) is an important anatomical landmark for clinical examination. It marks a transverse plane, also called Th4/Th5 vertebral level. The plane passes through the sternal angle and intervertebral disc between Th4 and Th5. At this level:
- Costal cartilage of second rib articulates with the sternum.
- Superior mediastinum is separated from the inferior mediastinum.
- Ascending aorta transitions to the aortic arch. Aortic arch transitions to the descending aorta.
- Superior vena cava enters the pericardial sac.
- Trachea bifurcates into the left and right main bronchi.
Surface Markings of Pleura
The following table summarizes surface markings of inferior borders of visceral pleura (or lungs) at the end of unforced expiration, and parietal pleura. N.b. that visceral pleura (and lungs) at the end of full inspiration reaches the borders of parietal pleura.
| Lungs (Visceral pleura) | Parietal pleura | |
| Midclavicular line | 6th rib | 8th rib |
| Midaxillary line | 8th rib | 10th rib |
| Paravertebral line | 10th rib | 12th rib |
Surface Markings of Lungs
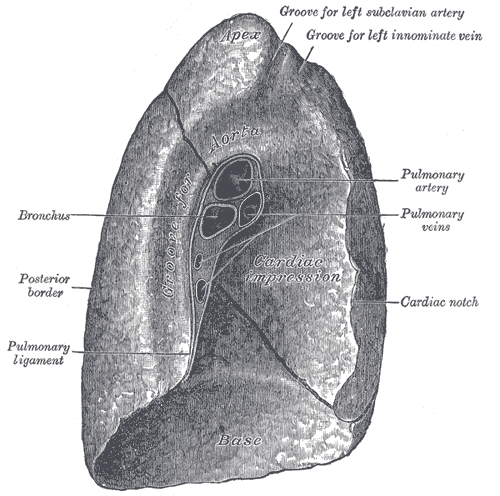
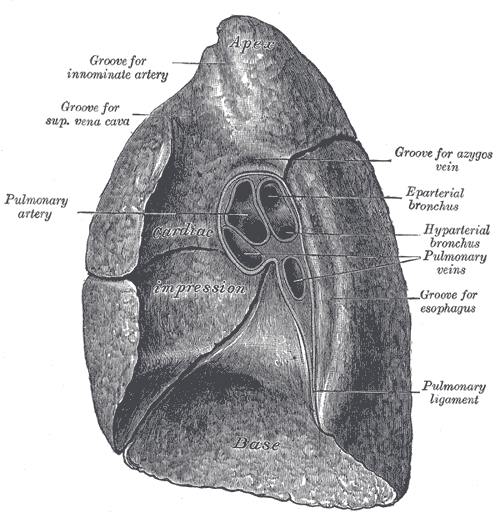
To appreciate surface markings, one need to be familiar with normal lung anatomy.
Left lung is divided by the oblique fissure into two lobes, an upper and lower. Right lung is divided into three lobes by two fissures, the oblique fissure and the horizontal fissure. Horizontal fissure separates upper and middle lobe of the right lung.


Oblique fissure. On the surface, markings of the oblique fissure run from the spinal process of T4 to the 5th intercostal space in the midaxillary line and along the 6th rib to the anterior midline.
Horizontal fissure. The fissure extends from anterior midline horizontally along the 4th rib and merges with oblique fissure in the midaxillary line.
Caveats and Errors
Counting ribs close to the midline. It is common error to count ribs anteriorly close to the midline. When palpating, physician must go inferiorly and laterally to avoid miscounting ribs that are articulating with the sternum indirectly.
References
Chi, J., Artandi, M., Kugler, J., Ozdalga, E., Hosamani, P., Koehler, E., … Verghese, A. (2016). The Five-Minute Moment. The American Journal of Medicine, 129(8), 792–795. https://doi.org/10.1016/j.amjmed.2016.02.020
Bickley, L. S., Szilagyi, P. G., & Hoffman, R. M. (2017). Bates’ guide to physical examination and history taking (Twelfth edition). Philadelphia: Wolters Kluwer.
Drake, R. L., Vogl, W., Mitchell, A. W. M., & Gray, H. (2015). Gray’s anatomy for students (Third edition). Philadelphia, PA: Churchill Livingstone/Elsevier.
List of anatomical lines. (2017, December 23). In Wikipedia. Retrieved from https://en.wikipedia.org/w/index.php?title=List_of_anatomical_lines&oldid=816818634